
SERIAL VOICE RECOGNITION MODULE
Required Components :-
- Arduino uno
- Breadboard (or breadboard shield)
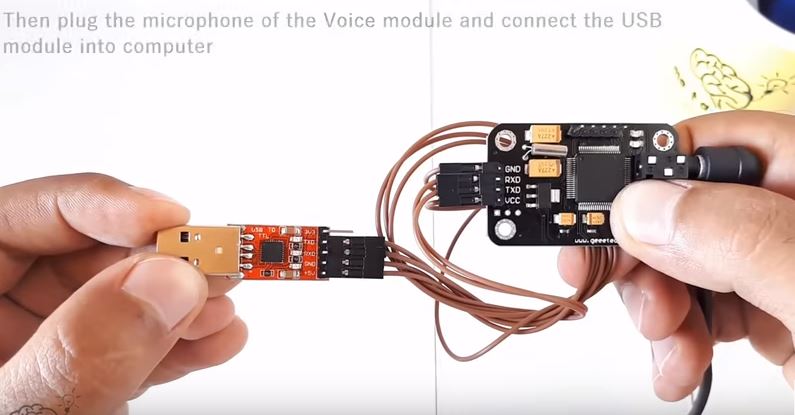
- Voice Recognition Module (serial)
- Microphone
- RGB LED
- 3x 220 Ohm resistors
Connection between Arduino* and module for recording procedure:
Module Vcc to Arduino 5V
Module GND to Arduino GND
Module RX to Arduino RX
Module TX to Arduino TX
*You must remove ATmega328p from board or program it with blink example. If you want you can also use one usb to serial board to complete this procedure.
Available commands:
Delete Group 1 - send hex AA 01
Delete Group 2 - send hex AA 02
Delete Group 3 - send hex AA 03
Delete All Groups - send hex AA 04
Record Group 1 - send hex AA 11
Record Group 2 - send hex AA 12
Record Group 3 - send hex AA 13
Import Group 1 - send hex AA 21
Import Group 2 - send hex AA 22
Import Group 3 - send hex AA 23
Query the recorded group - send hex AA 24
Circuit Diagram :

connections are pretty easy, see the above image with the breadboard circuit schematic
Source code :
int redPin = 9; // R petal on RGB LED module connected to digital pin 11
int greenPin = 10; // G petal on RGB LED module connected to digital pin 9
int bluePin = 11; // B petal on RGB LED module connected to digital pin 10
byte com = 0; //reply from voice recognition
void setup()
{
Serial.begin(9600);
pinMode(redPin, OUTPUT); // sets the redPin to be an output
pinMode(greenPin, OUTPUT); // sets the greenPin to be an output
pinMode(bluePin, OUTPUT); // sets the bluePin to be an output
delay(2000);
Serial.write(0xAA);
Serial.write(0x37);
delay(1000);
Serial.write(0xAA);
Serial.write(0x21);
color(255,255,255); // turn RGB LED on -- white
delay(5000);
}
void loop() // run over and over again
{
while(Serial.available())
{
com = Serial.read();
switch(com)
{
case 0x11:
color(255,255,255); // turn RGB LED on -- white
break;
case 0x12:
color(255, 0, 0); // turn the RGB LED red
break;
case 0x13:
color(0,255, 0); // turn the RGB LED green
break;
case 0x14:
color(0, 0, 255); // turn the RGB LED blue
break;
case 0x15:
color(0,0,0); // turn the RGB LED off
break;
}
}
}
void color (unsigned char red, unsigned char green, unsigned char blue) // the color generating function
{
analogWrite(redPin, red*102/255);
analogWrite(bluePin, blue*173/255);
analogWrite(greenPin, green*173/255);
}
.....................................................................................................................................................
No comments:
Post a Comment